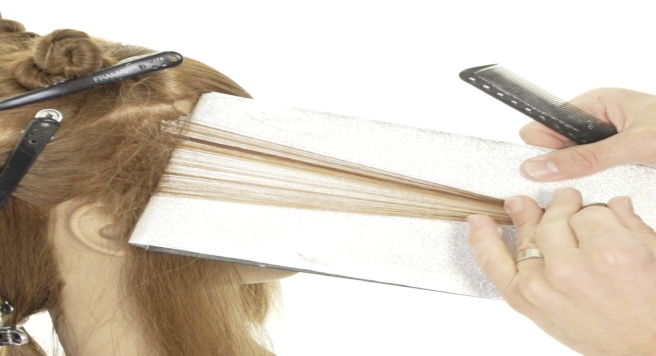
The Hairbrained Pro Blog

Hairbrained Quick-Tip: Scissor vs. Razor when Graduating Article tag: New Blog
Hairbrained Quick-Tip: Scissor vs. Razor when Graduating
Gerard Scarpaci, Hairbrained Co-Founder, and Julian Perlingiero, world-class educator, understand the importance of mastering a variety of tools. “It’s important to be diverse,” confirms Julian. “I think a lot of my tool selection is based not just on the results that I want, but on the texture that’s in front of me.” And though precision and fundamental shapes will always reign supreme, understanding that different tools yield different results is valuable. “I think that there’s tons of ways to do things, as long as you do it with knowledge and control,” confirms Gerard. This is particularly true when it comes to creating shapes with graduation, such as a graduated bob, or a bob with graduation. “The sectioning, the combing, the body positioning – it’s all very much the same,” says Gerard. “It’s about precision and accuracy. The difference is in the tool, and the way it removes the hair. The razor moving up and down, at varied strokes – it’s like sketching. What the scissor does is more like a blueprint; the lines are sharp. Though the shapes are similar, the approaches are different.” Here, Hb shares our quick-tip for creating graduation with a scissor, versus creating graduation with a razor.  Quick-tip: “When graduating with the scissor,” says Gerard, “it’s about consistently elevating as you work your way up the head, and managing finger position to maintain the desired angle and weight build-up. Whereas with the razor, the goal is to not elevate – but instead – use the size and depth of the razor stroke, which incrementally becomes larger and deeper as you work your way up the head.”  
Read article
Hairstylist Quick-Tips: Easy Meal Prep for Salon Success
Hairbrained Quick-Tips: Easy Meal Prep for Salon Success If your aim is to eat healthier, trying out some simple meal prep ideas is a great place to start. That’s because for many stylists, the biggest healthy-eating challenge has to do with making last-minute decisions about food. When you’re hungry and exhausted from a busy day spent standing on your feet, you’re less likely to make choices that nourish your body. Here, Katrina Beede Nguyen shares her quick-tips for mastering the meal-prep game, in a snap, so you can keep going strong in the salon – all week long.    Ingredients: Chicken with Marinade 3 organic chicken breasts Minced garlic Lemon Avocado oil 1 Tbsp. raw honey  Himalayan sea salt Coconut amino acids Mixed Green Salad Organic sliced cucumber Chopped red onion Frozen spiralized zucchini, thawed Frozen spiralized carrots, thawed  Pre-riced cauliflower Dressing Extra virgin olive oil Apple cider vinegar 1 Tbsp. tarragon Pink Himalayan salt Tip 1: Place the chicken in a shallow bowl + coat it with salt, pepper and quick-marinade. Set aside for at least 30 minutes and up-to to 24 hours. Tip 2: Heat a large pan over medium heat, and coat evenly with 1-Tbsp. coconut oil. Place the chicken breasts in the pan and allow them to Brown on both sides, cooking thoroughly (about 4 to 5 min each side). Turn the burner off and allow the chicken to rest. Tip 3: Using a separate pan, heat 1-Tbsp. coconut oil over medium to high heat. Add the riced cauliflower, and season with salt and pepper. Cook until slightly browned about 5-6 minutes; move into a bowl. Tip 4: Cook spiralized zucchini over medium high heat for 1 -2 minutes (until just-tender). Transfer to a bowl, and repeat, cooking the spiralized carrots for 5 minutes. Tip 5: Using bento boxes, build your lunches using the prepped items from tips 2-4. You can create a variety of flavor combinations, using chicken as your anchor-protein. Some possible combinations are: Chicken + cauliflower rice + mixed greens with red onions + cucumber and dressing Chicken + carrot and zucchini spirals + cauliflower rice + raspberries and blueberries Chicken + spiralized carrots + cauliflower rice + banana “Have fun with your flavor combinations, and it will help to keep your in-salon meals fresh and satisfying, plus will keep you fueled with wholesome energy.”~ Katrina For daily fitness and nutrition related tips, plus inspiration, follow Katrina on Hairbrained, Facebook and Instagram @ DVLPMNT_LIFESTYLE
Read article
Hairbrained Up-Close: Peter Gray Article tag: Hair Styling
Hairbrained Up-Close: Peter Gray
Hairbrained Up-Close: Peter Gray Peter Gray is an editorial styling genius. But he didn’t grow up in the world of fashion – rather – he was born and brought up in Zimbabwe, and was groomed from an early age to take an academic path. “I went to a boarding school in South Africa,” he confirms. “We had strict rules and there was very little tolerance for any sort of variance.” Hairdressing ‘found Peter’ when he cut another students hair to save him from a lashing – and remarkably, the haircut “actually looked ok,” remembers Peter. From that departure grew a thriving business. “I was cutting probably 150-200 kids out of the 320 in the school (which was well over half). I had a good little business going. It was a real adventure,” he remembers fondly.   But it wasn’t until Peter was gifted ‘Cutting Hair the Sassoon Way,’ that he finally knew for certain that he had found his calling. “This is it,” he thought. “This is what I want to do.” So he went to London to learn – to master this thing called hairdressing. And at this, he has succeeded. Peter’s work as a session stylist is celebrated, worldwide. His creations appear on the pages of international fashion magazines, such as Vogue and Harper’s Bazaar, and his finely crafted styles walk down some of fashion week’s most noteworthy runways.  Discover his unique and unexpected journey, his thoughts on legacy and instant stardom, plus learn why he considers himself a craftsman – and not an artist.         Q. You moved to London to master hairdressing. What was that like?    A. “I worked my way through a couple of different companies, Toni and Guy – I got canned from there and canned from Sassoon,” he laughs. Ultimately, he says, “I ended up at a little company called Cazaly and Co., in Coventry Garden. Eugene Souleiman was working there at the time,” he recalls, “as well as Steve Moore, David Adams, Greg Cazaly (who’s a session hairdresser), John Birchall, Thomas Mckiver – you know, real legends in the industry, today.” “There were all of these guys at this little shop in Coventry Garden and the shop had different things going on; they used to let the St. Martin students dress their windows. It was just a buzzing and creative atmosphere. We worked our backsides off, and we got rewarded. We got to go to shows and to travel. It was the late ‘80’s so London was rocking, though financially everything was in the pits. It was a mad creative atmosphere.” Q. Today, you’re known for your skills as a session stylist. Was this always the case?  A. “When I first started, I was cutting, coloring and dressing,” says Peter, “because they were competition hairdressers, the guys I was working with.” While I was at Sassoon, remembers Peter, “I was working for Proctor & Gamble (as much as I was working for Sassoon) doing their imaging. Very quickly I understood that in order to make a good picture, you have to cheat the results. You have to understand that two dimensions is different than three dimensions – and that what works in two dimension doesn’t necessarily work in three (and vice versa). I really enjoyed that process of interpreting that. So I ended up dressing hair, and working with Ray Allington, backstage. Based on that work, Ray said, ‘you should work in fashion.’ At the time, I was living in Manchester, which was the music hub of Europe. I was like – listen – I don’t know anything about fashion.” “But I moved back to London, and Ray introduced me to a lot of really interesting people, and I just sort of slid into fashion while I was still teaching at Sassoon. I had no fashion background – I didn’t really understand fashion – and I had no formal training in dressing hair, so I approached it in a slightly different way. I understood how to make images for musicians, how to make album covers, because that’s what I’d been doing. That’s what I was ok with – the rest wasn’t really my world. But I loved photography, I loved the process of photography, I loved the people on sets, I loved the energy. Here I am god knows how many years later – and I’m still hammering it out.” Q. Share your thoughts on editorial vs. behind the chair work.A. “The editorial world is changing fast. I always say to every hairdresser that aspires to do editorial – you have to realize – that the love that you get from a [behind the chair] client, you will never get from anybody else, in your life. Once you have that bond, you really have to ‘mess up’ to shatter that. It’s an incredible bond that exists between hairdressers and their clients, and I think that a lot of hairdressers take that for granted. I think they sit back on their laurels and they don’t appreciate how special that bond is.” Q. Describe your ‘average’ workday. A. “I think that the amazing thing about doing the job that I do, is that every day is different – every day is noteworthy. [From day to day] you don’t interact with the same people, at all. It’s an extremely erratic industry like that. It depends on where you’re shooting, who you’re shooting with. I quite like that, because new people constantly challenge me; everyday is interesting.” Q. How do you conceptualize your pieces? A. “I try and approach everything in an analytical way, I try and find something that hasn’t been done before, or something that relates. The piece I did recently [in Australia, to raise awareness on the problem of human trafficking] is a great example of that.” The thought process was simple and straightforward, explains Peter. “I thought of fashion, and the cotton trade. What do we do with cotton? We grow it and it exploits labor, we then spin it. There’s a huge labor cost in producing cotton. So, we went back and we learned how to spin, and we spun 4,500 feet of hair – hand spun – two assistants and myself. We worked our butts off, you know, to create something that hadn’t been done before - to make a statement about a cause.”  “I try to always have a cause, because a lot of my work in fashion is just about making pretty images. The purpose of these images is to sell goods to people, which they already have. My business is about creating ‘aspiration’ through lifestyle, aesthetics and appeal – that’s what advertising is.” “When I get an opportunity to do something for myself (such as the NOISE show), I first work out the analytical: What has been said before, what has been done before, what I feel needs to be said, what bears repeating. If something needs to be said again, I’m quite happy to cannibalize my own ideas. You know, I don’t hang onto ideas. A lot of people worry about people ripping them off, and I’m like, rip away! The more you rip, the more it forces me to grow, to come up with something else. It’s a great complement – it’s the best compliment. It’s a real honor and a huge privilege.”                    Q. Do you consider yourself a craftsman – or an artist? A. “I prefer to think of myself as analytical as opposed to philosophical. I love making statements, and causing people to question the status quo. I feel like, if there’s a cause and I can draw attention to it in an interesting and creative way, it’s likely to be more affective than holding a hand out and asking for money.” But ultimately, Peter explains, he considers himself a craftsman – and not an artist. “I approach what I do – whatever I do – as a craft,” he explains. “I don’t like the word artist. Artists have so many other influences that I’m not personally comfortable with. I’m not here to judge someone who calls himself or herself an artist – though I’d like to see what they have to throw down – that’s always an interesting point,” he laments. “People work commercially, and then call it art, and I’m like really? We need to check the definition of art, here. Our business is full of pomp and circumstance, isn’t it? I think most creative industries are.”  Q. Can you share your thoughts on ‘instant stardom?’ A. The great thing about instant stardom, says Peter, is that it’s short lived. “Everybody is a rock star, now, and they want success immediately.” It’s a bit like beauty, he adds. “When the girls I work with get nasty I tell them – remember – I’ll be doing this long after you’ve come and gone.” “Everything now is about ’15 minutes of fame.’ Nobody considers legacy anymore. What happened to legacy,” he wonders? “What happened to being remembered? Do people honestly think that Facebook and Instagram will be around in five years time? Everything is transitioning so fast.” But, he adds, “You have to jump on the ride and see what happens.”    As a craftsperson, Peter is always working to push himself further – to hone and develop his skills. “I still test – and people want to know, ‘why do you test?’ You’re never too good to test, try and experiment,” Peter thinks out loud. “People think: I’m not working for free. And to that, I say, you’d better not work in this industry. You need a huge editorial portfolio, which is developed largely for free.” When asked how he stays inspired, Peter wonders, “How could I not stay inspired? I get to work with some of the most incredible creative minds – not just in the business – but also on the planet. I get to collaborate with artists, musicians. It’s extremely stimulating,” says Peter. “I find going to work pretty relaxing – it’s not really work. If you enjoy something, and feel mentally and physically rewarded for it (hairdressers are, by and large, happy people), its never work,” concludes Peter.      
Read article
Hairbrained Quick-Tip: Clock-Cutting with Ira Pope Sage
When it comes to haircutting, Teach In @ISSE 2019 Educator, Ira Pope Sage craves simplicity. To accomplish this, he’s created a curriculum that relies entirely on one philosophy: Clocking cutting. “I look at the head as a clock,” Sage confirms. “This is a technique that’s very friendly for hairdressers of all skill levels. I believe that knowledge creates simplicity – and that you don’t have to complicate things to be advanced.”   Read on to get a quick-tip guide to his straightforward clock cutting method – and get up-close with Sage’s simple, yet complete, haircutting system. Tip 1: The clock. To begin, Sage explains that the clock is something that he visualizes as being laid out on the floor, facing the ceiling. “I look at the nose as being 12 o’clock, the right ear as being 3 o’clock, the vertebrae as being 6 o’clock, and the left ear as being 9 o’clock.” In addition to these points, which he calls primary hours, Sage notes secondary hours. These give him reference points, and guide him in creating – and explaining – any cut. Tip 2: Body positioning. To understand proper body positioning, Sage utilizes the primary and secondary clock-hours. He says that this theory is simplest to describe as it relates to cutting bangs. “For example,” he says, “if I’m cutting a square, very straight pair of bangs, I’ll start at the secondary hour of 1:30, and cut a straight line. Then, I’ll move my body over to the secondary hour of 10:30, and cut another straight line. Finally, I’ll move my body to the primary hour of 12 o’clock, and connect those two lines together. At this point, I’ll have a pair of square, very straight bangs – which is one of the hardest pair of bangs to create, truly.” Working in this same way, Sage is able to instruct students on proper body positioning, with ease. Tip 3: Elevation. When it comes to elevation, Sage relates his levels to those of a clock – but he does so in a unique, and personal way. “I love to sleep,” he says, “and in the morning time, I’m more tired. So, if I’m below noon (which he considers parallel to the floor), I’m heavier and more tired. I consider that graduation land. If it’s past noon, I’m lighter; I’m starting to wake up. I consider that layer land.” Though clock cutting isn’t a new technique, Sage has re-imagined it, and has made the theory his own. The language and simplicity are universal, making it accessible to hairdressers, worldwide. Watch Sage demonstrate his technique, live, on HbLive #74.  
Read article
Hairbrained Quick-tip: Principles of a Fringe with Traci Sakosits
Hairbrained Quick-tip: Principles of a Fringe with Traci Sakosits Cutting the perfect fringe can seem like a tasking – and sometimes impossible – endeavor. But if use the right methods, and follow a few simple guidelines, you can be sure to get the style you’re after, every time. Read on to discover the ABC’s of crafting a technically precise fringe, in this how-to segment with Traci Sakosits, North American Creative Director of Sassoon. Before you cut: A Fringe Defined A full fringe (or bang) is the area of hair from the round or curve of the head (the frontal bone). Simply put, it’s the hair that sits over the forward head and between the temples. Before you begin to cut a fringe, make sure to carefully assess the hairline’s organic shape, and subsequent growth patterns. This evaluation – if done properly – can determine the success of your bang. Before you begin to cut, section the hair parallel to the hairline for a geometric or graduated fringe. This sectioning is integral for consistency, control and finite detailing. If you’re aiming for a soft look, forgo establishing length first; in this case, the sectioning would be vertical from the top of the head.  Length The length of the fringe can help to create the look that you’re aiming to achieve. Here’s how. The shorter the length – the stronger the look will be. The length should work to complement the wearers bone structure. The brow bone, shape of the forehead, eyebrows, eyes and cheekbones should be acknowledged – and used as inspiration – when creating a fringe. Technique Decide on your technique – and execute with precision. Discover the best technique for your look, here. A geometric fringe is cut with little elevation and/or tension. A heavy (but soft) beveled edge fringe is cut through the fingers, with elevation. The higher the elevation, the softer the edge – or line – of the fringe will be. The start of the elevation is forward and flat from the top of the head. A soft and textured sheer fringe is cut with at least 90 degrees of elevation.  Shape   The last factor to consider when creating a face-framing fringe is shape. Discover which shapes work to best compliment various areas of the face. A square fringe is the strongest of the looks, and is best for framing the eyes and cheekbones. It can help to create lift and length, vertically. A round fringe encourages a softer aesthetic. It’s best used to open up the center of the face shape. Creatively, a combination of angles can be used. Though crafting a face-framing fringe can seem difficult, careful assessment and clever planning can make it a snap. So take your time – and make sure to take length, technique and shape into account – and you’ll end up with the perfect look.       Images courtesy of: Marie Claire Bozant and Randy Taylor   
Read article
How to Work Safely With A Straight Edged Razor. Article tag: Feather
How to Work Safely With A Straight Edged Razor.
As a craft hairdresser, it's important to know that each tool in your bag can create a unique texture and aesthetic – and the razor is no exception. With the ability to turn out precise lines, yet versatile movement, artists that have mastered razor cutting can attest to the classic,yet on-trend looks produced by one. 
Read article
Addressing Texture: Color for Straight, Wavy and Curly Strand,  with Lupe Voss
Addressing Texture: Color for Straight, Wavy and Curly Strand, with Lupe Voss
Addressing Texture: Color for Straight, Wavy and Curly Strands When working to achieve dimensional color, there are a variety of factors that come into play – and those factors can have an impact on how we achieve the perfect, end results. One such element is texture: Whether straight, wavy or naturally textured, how a client styles their strands can change the look of a color application. Read on to get some ideas on application tips and tricks for getting the perfect effect, every time – and help take your clients look from ‘so-so’ to sensational. Texture – and light Texture, combined with your client’s chosen method of heat styling, can affect the way the light hits her color – which can play a big part in how your color application wears. Here’s why. Straight strands. Straight hair is one-dimensional. Because of this it can be difficult to see a contrast in levels (the heavy curtains hide dimension that’s been placed on the interior of the hair). To achieve contrast on straight strands, add dimension at the top subsection. Wavy tresses. Wavy hair is two dimensional, and as such, it both reflects and absorbs light. As the hair waves and opens, color placement is visible below the top layer; dimension is subsequently created with movement. To create contrast, the interior can be darker. I like to use the progression technique (dark to light, such as tipping or hair painting) to impart the perfect variation in levels. Curly locks. Coils and curls are three dimensional, and they absorb light. This can make application tenuous – and tricky. If your client has this texture, color can appear spotty if not applied correctly. To discover my complete how-to for coloring coiled or highly textured strands, go here. These natural texture variables can change your color placement techniques. But what happens when you have clients with wavy or curly strands that occasionally like to straighten their hair? Though this isn’t uncommon, it’s important to be transparent with your clients. Be sure to ask your clients how they plan to style their strands, and explain how you might be able to meet their expectations. Here are some options: Wavy to curly hair: Natural level 3, desired Level 5 Level choice. At the new growth, use a level 5. On the mid-lengths and ends, apply a level 6, and add pieces of a level 7/8 for dimension. This will add brightness to curly ends, and prevent them from appearing too dark. Technique choice. Apply a standard new growth application with a level 5 color. Backcomb the ends using a tipping technique, using a color that’s 2-3 levels lighter than your desired end results. For the mid-lengths and ends, gloss with a level 6 between the foils. Curly to straight hair: Natural level 3, desired level 5 Level choice. At the new growth, apply a level 5. On the mid-lengths and ends, use a level 6, and add a level 5 low light along with pieces of a level 7/8 for dimension. Technique choice. Opt for a standard new growth application, implementing your level 5 color. Next, take diagonal slices to create a shadow, using a level 5 color. Backcomb the ends using a tipping technique, with a color that’s 2-3 levels lighter than your desired end results. Add a gloss between the foils to the mid-lengths and ends using a level 6. Straight to wavy: Natural level 3, desired level 5 Level Choice. At the new growth, use a level 5. On the mid-lengths and ends, use a level 5 for the base, and add backcombed pieces of a level 6/7 for dimension. Technique Choice. Implement a standard new growth application using a level 5 color. Next, backcomb using a tipping technique with a color that’s 1-2 levels lighter than your desired end results. Finish by glossing the mid-lengths and ends between the foils with a level 5. Go here and here to get my full explanation on new growth, mid-length and ends color application techniques. These examples can act as a roadmap to creating the perfect color on various hair types and textures. And though the techniques vary, the visual results will be the same. Remember to always ask your client how they will be wearing their hair – and use that as a springboard for applying their color.
Read article
Hairbrained Step-by-Step: The Shake
    Warm-weather season is well under way – and as the barometer rises – loose, carefree styles are among the most requested. Shaggy – yet ultra-classic – ‘The Shake’ fits the bill, perfectly. Well suited to a variety of lengths and textures, this round-shaped style gives a nod to the seventies, without looking dated. Julian Perlingiero, Master Educator and Hb Live Host, shares the fundamentals of this light, ultra-movable cut. Step 1: Begin by dividing the hair at the natural parting on top. Step 2: Next, implement a diagonal section that’s parallel to the front hairline. Step 3: Working from the cheekbone down to the collarbone, cut a flattering, face framing angle. Step 4:  Continue working in parallel sections back to the ear, and as you move through the sections, elevate each one a little bit higher.      Step 5: Once you’ve reached the area behind the ear, move section by section towards the center of the head, cutting a curved line from the hairline to the crown of the head. Step 6: Once you’ve reached the centerline (of the back of the head), repeat the same process on the second side. Watch the complete series, Classic Cutting Foundations with Julian Perlingiero, at: https://www.facebook.com/pg/hairbrained.me/videos    
Read article